Many of WordPress users would like to control their own widgets and have various widget options to handle that. In this article I will present you a nice plugin called Widget Options.
The author of this plugin is Jeffrey who is also knows as phpbits. I have already reviewed another plugin from this author: Forty Four, a great WordPress 404 Plugin.
This is another great plugin and I will create a simple review of it in the next few chapters.
Widget Options
When you install this plugin which you can find by searching for Widget Options, you can immediately go to the Widgets area in your WordPress dashboard. If you open an already added widget to a sidebar, you will have a nice set of options at the bottom of each widget.
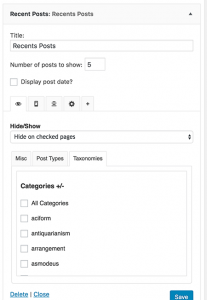
Tabbed options on a widget
These tabbed options are:
- Visibility – choose where this widget will be shown or hidden
- Device – choose on which devices this widget will be shown or hidden
- Alignment – choose the text alignment of the widget
- Settings – some miscellaneous setting such as adding your own classes, WP Conditionals or PHP code, etc.
Visiblity
You can choose to display or hide a widget on pages, posts, custom post types or taxonomies (categories). You can only choose a rule to show or hide on the checked content so be sure to choose something that you won’t need to change every time you add something.
Example: If you will hide this widget on only 3 pages (out of 10, 20 or more) you will choose the rule to hide the widget on checked pages and then check those 3 pages.
Device
You can choose between three devices and the same rule to show or hide for the checked devices.
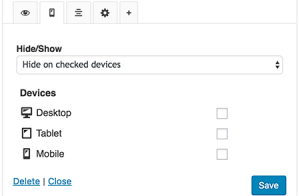
Device Options
This plugin uses CSS to hide or show your widget, so the content will still be there so that if you users changes viewport, the widget display option will change accordingly.
Settings
The miscellaneousness settings can give various options. The interesting option is to use WordPress conditionals or PHP code. You can write is_single() to show the widget only on single posts.
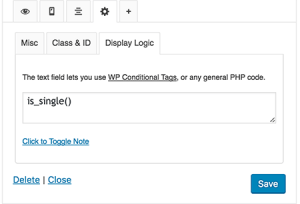
The Widget Settings
There could be some time where you realise that some of the widget tabs or options are totally not important and could confuse your client. By going to the Widget Options settings page, you can choose which tabs or option to enable or disable.
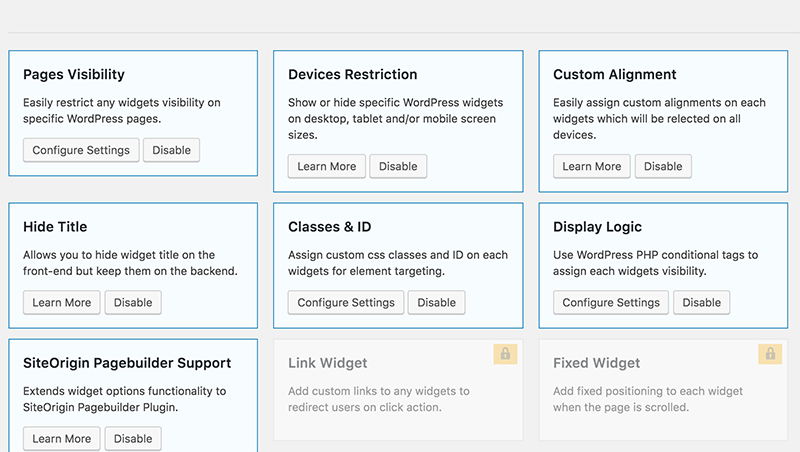
Settings Page
You can click on some and configure their settings. This could give you even more options or you can take out some which you don’t need.
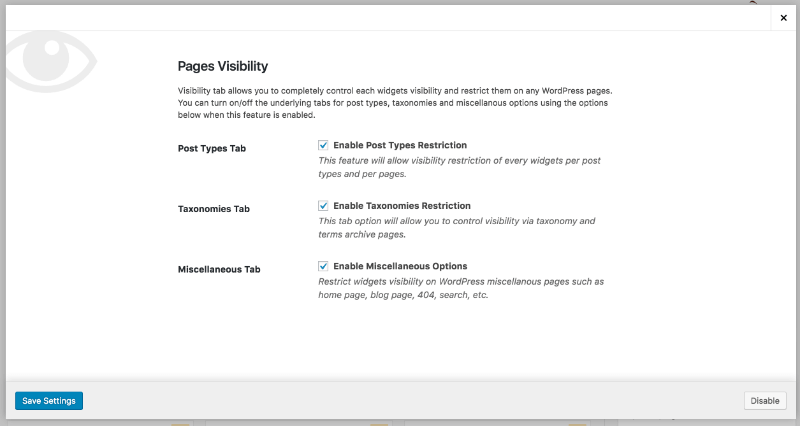
Configuration Panel
As you can see from this image, there are other options that you can use to extend your control of the widgets. This is the premium version of this plugin.
Extended Widget Options
The Extended Widget Options is the premium version of this plugin and let’s you enable all of those fancy options. With the premium version you will get new options inside existing tabs and also new tabs with various options. Let’s list the existing tabs first:
- Visiblity
- New Configuration setting – child pages can inherit the visibility from parent pages
- Device
- Nothing changed
- Alignment
- You can set different alignment for each device
- Settings
- Animate the widget (you can even disable the
animate.cssif your theme has it already) - Add a link to the widget
- Fix the widget on scroll
- Animate the widget (you can even disable the
There are also plenty of configuration settings for each of those new additions. Here is an example of the fixed widget configuration panel:
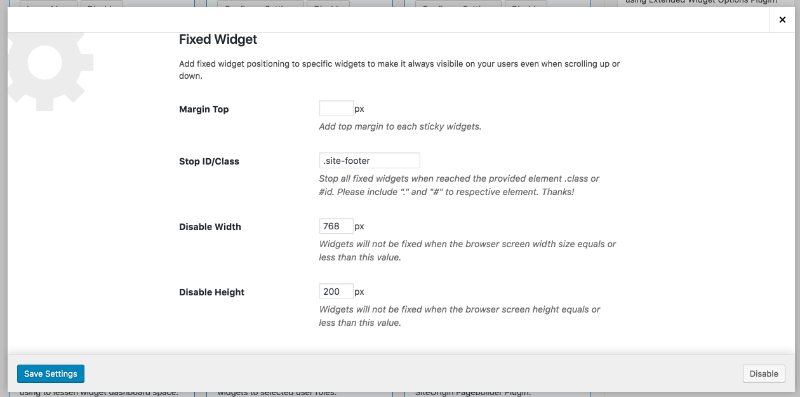
Options for Fixed Widget
Let’s now learn about the new tabs:
- Columns
- Roles
- Days & Dates
- Styling
- Shortcode
Columns
Columns tab gives you options to control the layout of your widget. If you perhaps have a very wide sidebar or footer where your widgets will appear and your widgets feel just to stretched, then you can easily place one beside the other.
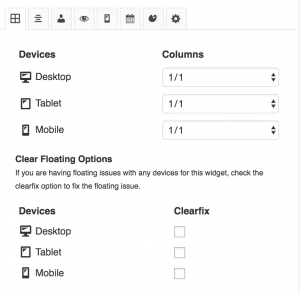
You can also choose how will those widgets look on other devices. So, if you would like to show a two widgets next to each other only on Desktop, you would leave everything as it is except on both of those widget you would choose the Desktop columns to be 1/2.
Columns tab also offers you to clear the floats if there are any issues on your layout, which can happen when floating elements.
Roles
This is an interesting tab. You can set which roles can see a widget. If perhaps you have a community website where there are different roles and you want, for instance, have a widget that display the top members of the community. But that widget should be displayed only for the administrator and moderators of the site, because you don’t want others to see which member will get a “No. 1 Member of the Month” reward.
You would then use this tab and choose the roles which you want to see this widget.
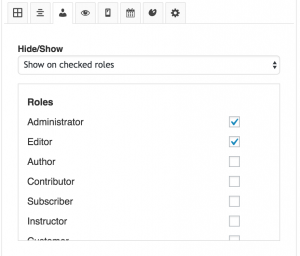
Another great thing about this option is that the widget will actually only be rendered if the rules apply. This widget can’t be parsed from a website or similar because it won’t be renders in the HTML.
Days & Dates
I was really happy when I saw this. Let’s say you have a website that display quotes or hosts some community chats on specific days. Just for example, we have a “Friday MyDay” day where people will talk what they will do, what have they done or something similar for themselves on Friday each week.
You want to notify your readers and visitors on your site. With an option like this, you can display a widget with an image that says “It’s Friday MyDay” that will link to a conversation panel. By setting the widget to display only on Fridays, you will not need to worry about removing and adding the widgets on specific dates.
This can be also useful when you have a giveaway or something similar and display it in a range of days or set a from-to date range.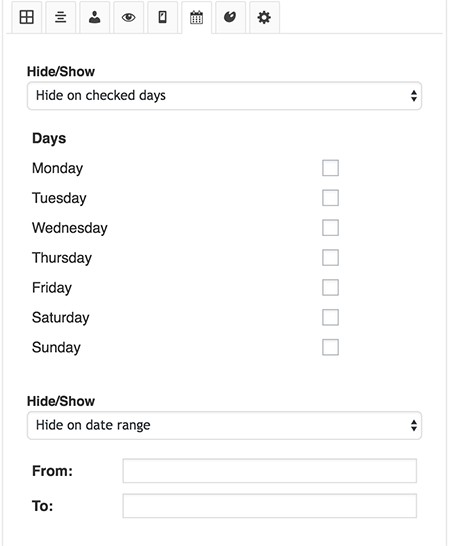
Styling
This can be very useful if you want a widget to stand out from the crowd in your sidebar or footer with some nice colors. Beware of matching colors and don’t use some that could potentially hurt the eyes of your visitors.
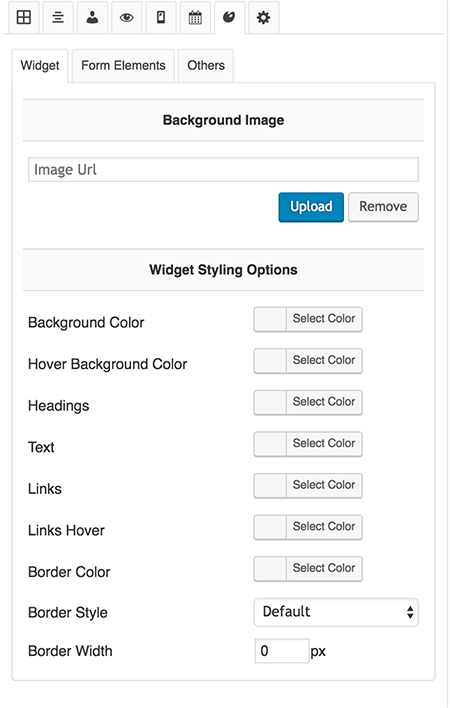
A nice feature here is the three tabs under so that you can completely customize the look of typography and also form elements.
Shortcode
Under each widget you get a simple shortcode which you can use to insert in any of the pages, posts or other content where you can use shortcodes. By adding that shortcode in the content you are able to display your widget as a part of your content.

Combining this and the visibility option you can erase one widget from the sidebar and add it in the content so that your readers don’t read the same information twice.
Developer’s Perspective
From a developer’s perspective, I wanted to see how this plugin was made. First thing I notice is the separation of free and premium options.
This can help switching between free and premium version without losing any configuration. Simple & smart!
There are some hooks for adding your own settings inside configuration panels, and I love it! The downside here is that I did not see an action where we could attach our own save logic for our settings. Since it is a premium plugin that is maintained only by its author I do get it and it is not a big deal.
But, if I am developing a site for a client of mine and they want even more control, this could be a great feature to have. Maybe we will see this in a newer version of this plugin.
The CSS files that are included on the front end are basically small. The core css is only around 13KB and it is minified. The other CSS file is the animate.css file which can be removed from the Configuration Panel of Animation (This is only on premium version).
When working on a theme with this plugin in mind, you can always copy those 13KB in your style and remove the core CSS file with a simple wp_dequeue_style.
Conclusion
After I have tried it with several set of options and everything worked nicely, I must say that this is a great plugin even for developers. This is a must for regular users if they want some simple control over their widgets.
Become a Sponsor
Share this: